This crispy baked chicken tender basket is pure comfort food, but without the heavy fryer mess. It has that old-fashioned diner feel, yet it still fits right into a busy weeknight at home. I love recipes like this because they feel special, and still stay simple enough for almost any cook to manage.
What makes it so good is the mix of textures and flavors. You get 1 1/2 pounds chicken tenderloins soaked in buttermilk, a little hot sauce if you want a gentle kick, then coated with flour, panko breadcrumbs, and Parmesan cheese. On top of that, garlic powder, smoked paprika, and onion powder add warm flavor, while the honey mustard dip brings a creamy, tangy finish.
The method is easy to follow, too. First, you marinate the chicken, then coat it, bake it at 425°F, and make the dip while the tenders cook. In about 45 minutes total, you can have a golden, crisp basket of chicken tenders on the table. Each serving comes in at about 380 kcal, so it feels hearty without being too heavy.
This recipe is great for so many moments. It works well for family dinner, game day, or an easy weekend meal. Also, it is a smart choice when you want something warm and filling on a chilly night, but do not want to spend all evening in the kitchen.
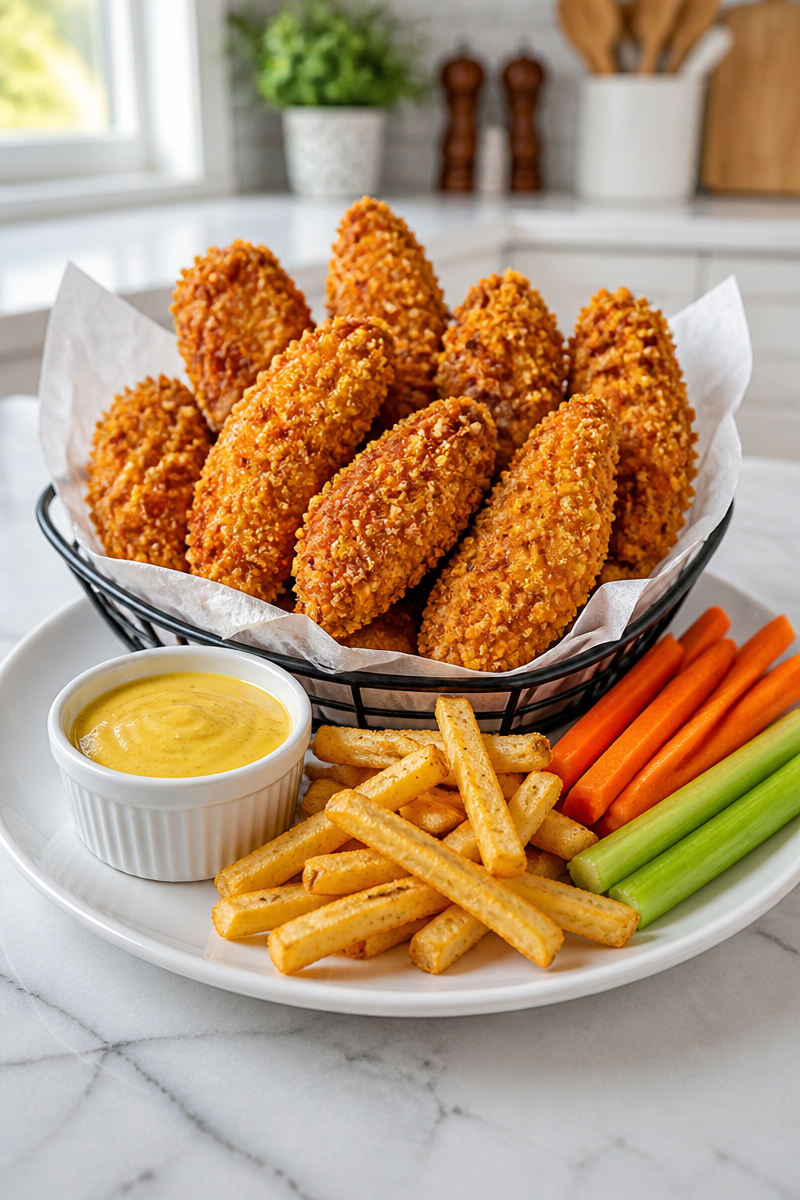
Why You’ll Love This Crispy Baked Chicken Tender Basket
- Quick and easy: With a 20-minute prep time and simple steps, this recipe fits busy schedules.
- Comfort food feel: It tastes like classic fried chicken tenders, but it is baked in the oven.
- Great texture: The panko breadcrumbs help create a crisp, golden coating.
- Family friendly: Kids and adults both love chicken tenders, especially with honey mustard dip.
- Simple ingredients: Most of the ingredients are pantry staples, so you may already have them on hand.
Chicken Tenderloins Tips
Chicken tenderloins are the star of this recipe, so start with pieces that look fresh and even in size. If you can, choose tenderloins that are similar in thickness so they bake at the same rate. Also, pat them dry before marinating. That small step helps the buttermilk cling better, and it helps the coating stay on during baking.
For the best result, let the chicken soak in the buttermilk for at least 30 minutes. However, if you have more time, up to 4 hours is even better. The buttermilk helps tenderize the meat, so the final chicken stays juicy inside while the outside turns crisp. Then, when you bread the chicken, press the coating on firmly so it sticks well.
Options for Substitutions
- No buttermilk? Use plain yogurt thinned with a little milk.
- No panko breadcrumbs? Try crushed cornflakes or regular breadcrumbs for a different crunch.
- No Parmesan cheese? Use grated Pecorino Romano or leave it out for a milder flavor.
- Want less spice? Skip the hot sauce and reduce the smoked paprika a little.
- Need a gluten-free version? Use a gluten-free flour blend and gluten-free breadcrumbs.
- Prefer another dip? Swap the honey mustard for ranch, barbecue sauce, or a simple garlic aioli.
Watch Out for These Mistakes
One common mistake is skipping the drying step. If the chicken is too wet before marinating, the coating can slide off later. So, take a moment to pat the tenderloins dry. Also, do not rush the buttermilk bath. Even a short soak helps the chicken stay moist and gives the breading something to grip.
Another mistake is crowding the baking sheet. If the tenders sit too close together, they will steam instead of crisp. For that reason, leave space between each piece. If you have a wire rack, use it. That extra airflow helps the coating brown better on all sides.
It is also easy to overbake chicken tenders. Since tenderloins are small, they cook fast. Therefore, start checking near the end of the bake time. The safest way to know they are done is to use a meat thermometer and look for 165°F in the thickest part.
Finally, do not forget the oil spray. A generous coat of olive oil spray helps the panko turn golden and crisp in the oven. Without it, the breading can look dry and pale. So, spray both sides before baking for the best texture.
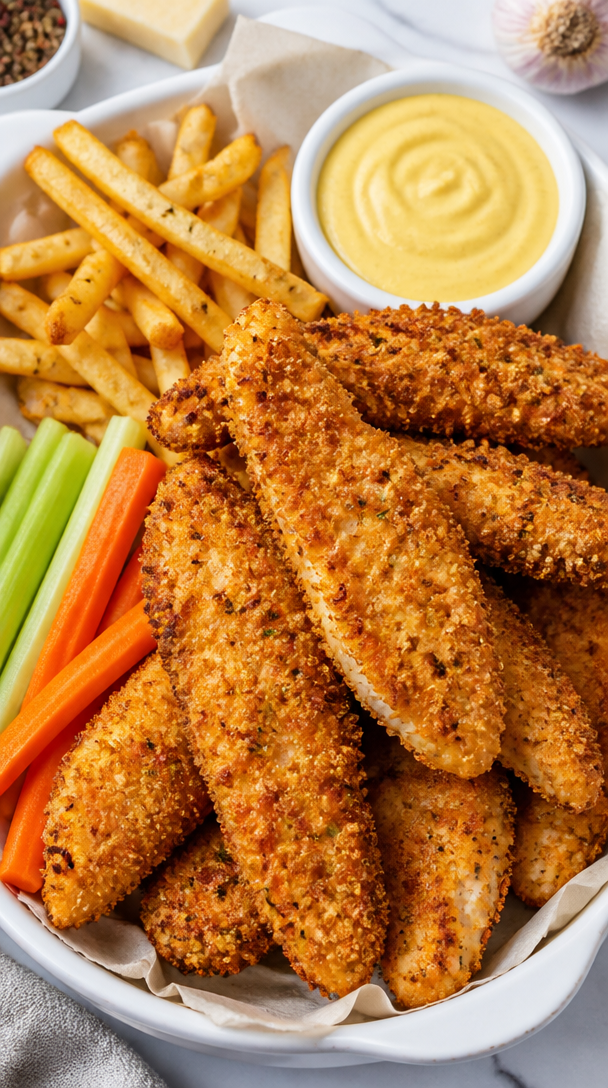
What to Serve With Crispy Baked Chicken Tender Basket?
This crispy baked chicken tender basket pairs well with classic sides like French fries, sweet potato fries, coleslaw, or vegetable sticks. If you want a lighter plate, try a simple green salad or roasted broccoli. Meanwhile, for a more filling meal, add corn on the cob or creamy macaroni and cheese. The honey mustard dip ties everything together, so even a few basic sides will feel complete.
Storage Instructions
Store: Refrigerate leftover chicken tenders in an airtight container for up to 3 days.
Freeze: Freeze cooked tenders for up to 2 months. For best results, place them in a single layer first, then move them to a freezer bag or container once solid.
Reheat: For the best texture, reheat in a 400°F oven for 8 to 10 minutes. On the stovetop, warm them in a dry skillet over medium heat until heated through and crisp again. In the microwave, heat in short bursts, but keep in mind the coating will soften.
Recipe Info
Preparation Time: 20 minutes
Cooking Time: 25 minutes
Total Time: 45 minutes
Difficulty Level: Easy
Servings: 4 servings
Calories: 380 kcal per serving
Estimated Nutrition
Estimated nutrition for the whole recipe (without optional ingredients):
- Calories: 1,400 to 1,650
- Protein: 120 to 145 grams
- Fat: 55 to 75 grams
- Carbohydrates: 90 to 120 grams
Ingredients
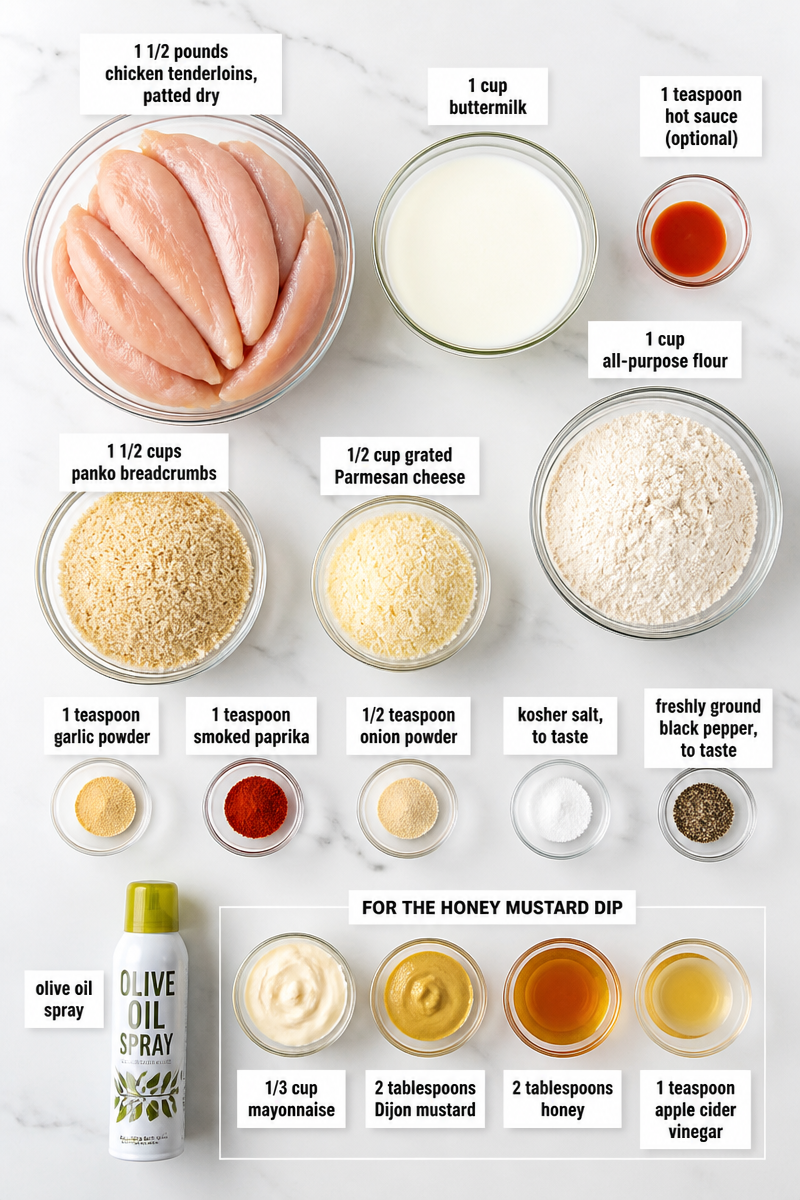
- 1 1/2 pounds chicken tenderloins, patted dry
- 1 cup buttermilk
- 1 teaspoon hot sauce (optional)
- 1 cup all-purpose flour
- 1 1/2 cups panko breadcrumbs
- 1/2 cup grated Parmesan cheese
- 1 teaspoon garlic powder
- 1 teaspoon smoked paprika
- 1/2 teaspoon onion powder
- kosher salt and freshly ground black pepper, to taste
- olive oil spray
- For the honey mustard dip: 1/3 cup mayonnaise
- 2 tablespoons Dijon mustard
- 2 tablespoons honey
- 1 teaspoon apple cider vinegar
Step-by-Step Instructions
Step 1: Marinate the Chicken
In a bowl, combine the chicken tenderloins with the buttermilk and hot sauce if using. Then cover the bowl and refrigerate for at least 30 minutes, or up to 4 hours. This step helps tenderize the chicken, and it also helps the coating stick later.
Step 2: Prepare the Oven and Breading Stations
Preheat the oven to 425°F (220°C). Next, line a baking sheet with parchment paper and, if you have one, place a wire rack on top. Then set out two shallow bowls. Put the flour in one bowl. In the second bowl, mix the panko, Parmesan, garlic powder, smoked paprika, onion powder, salt, and pepper.
Step 3: Coat the Chicken
Remove each tenderloin from the buttermilk and let the excess drip off. Then dredge each piece in flour, shaking off the extra. After that, press it firmly into the panko mixture so the coating covers all sides well. Take your time here, because a good crust starts with a good coating.
Step 4: Arrange and Spray
Place the breaded tenders on the prepared baking sheet with space between them. This matters because the chicken needs room to crisp. After that, spray both sides generously with olive oil spray. That little step helps the coating brown beautifully in the oven.
Step 5: Bake Until Golden
Bake the tenders for 12 minutes, then carefully flip each one. Bake for another 10 to 13 minutes, or until they are deep golden brown and crisp. Most important, check that the thickest part reaches 165°F with a meat thermometer.
Step 6: Make the Honey Mustard Dip and Serve
While the chicken bakes, whisk together the mayonnaise, Dijon mustard, honey, and apple cider vinegar in a small bowl until smooth. Then serve the hot tenders in a basket lined with parchment paper, along with the dip and your favorite sides. If you have leftovers, store them properly and reheat to bring back some of that crispness.
Conclusion
This crispy baked chicken tender basket brings together tender chicken, a crunchy Parmesan-panko coating, and a sweet-tangy honey mustard dip. Because it is baked instead of fried, it feels a little lighter, yet it still delivers that satisfying crunch everyone wants. Plus, the ingredients are simple, the steps are clear, and the whole meal comes together in about 45 minutes.
If you are looking for an easy chicken dinner that feels cozy, familiar, and crowd-pleasing, this one is a strong pick. Try it soon, then come back and share how it turned out. And if you enjoy recipes like this, explore more easy baked dinners and family-friendly comfort food recipes next.
