There’s something about cookies that warms the heart and brings families together. When I first stumbled upon the recipe for Corpse Finger Cookies, I was captivated by its creativity and uniqueness. These cookies are not just a delicious treat but a fun conversation starter at any gathering, especially during Halloween. They have a whimsical yet spooky flair, making them the perfect addition to your festive celebrations.
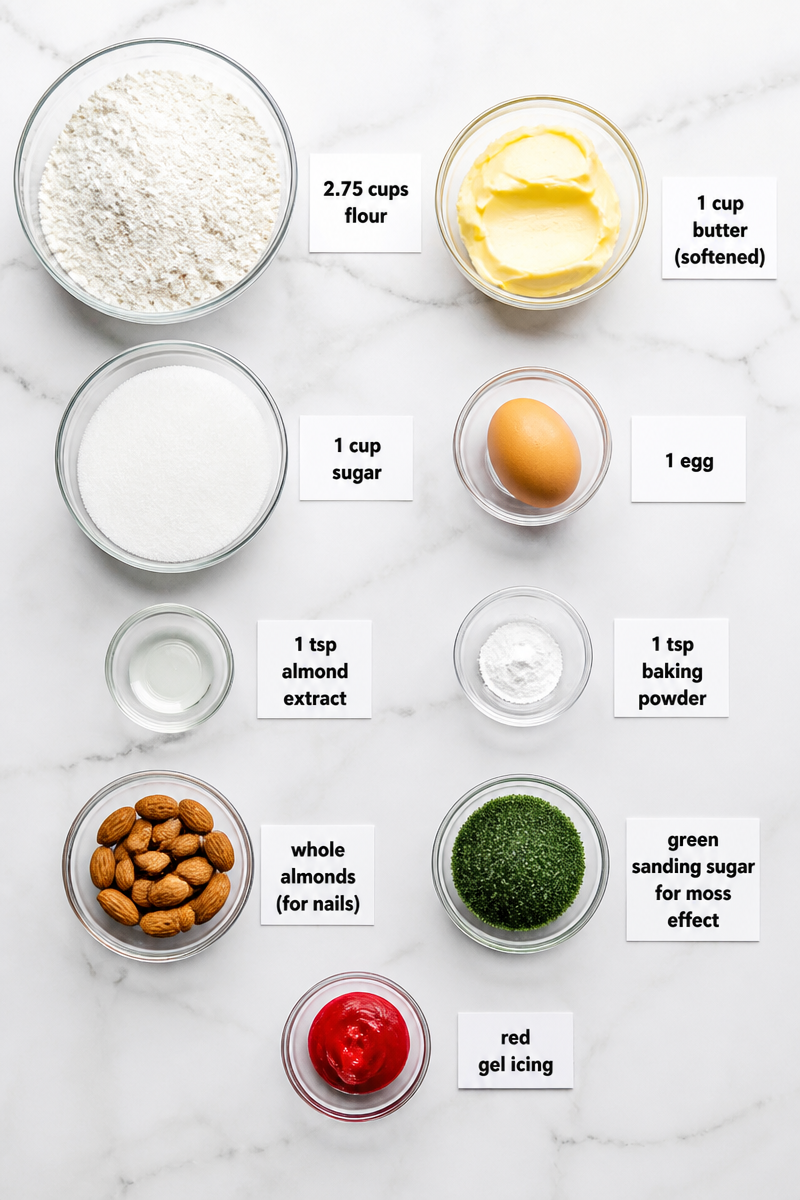
The key ingredients that go into these eerily delightful cookies include 2.75 cups of flour, 1 cup of softened butter, and 1 cup of sugar, blended together with a single egg, almond extract for an aromatic touch, and baking powder. To top it off, whole almonds serve as the “nails,” while green sanding sugar creates a mossy effect, and red gel icing adds a gory finishing touch. It’s that blend of sweet, nutty, and slightly salty flavors that makes these cookies truly enjoyable.
Making these Corpse Fingers is wonderfully straightforward. You start by preheating your oven to 325°F (165°C) and then cream the butter and sugar together, adding in the egg and almond extract. Mix in the flour and baking powder until a dough forms. After that, it’s just a matter of rolling the dough into finger shapes, tapering them, and creating those knuckle indentations. Press an almond into one end for the nail, sprinkle some green sanding sugar at the base, bake until golden, and finally, add a little red icing to simulate blood.
These cookies are fantastic for a variety of occasions, whether it’s for a Halloween party, a quirky get-together, or simply a fun afternoon bake with the grandchildren. They are an excellent way to make memories in the kitchen while creating a treat that is as fun to make as it is to eat.

Why You’ll Love This Corpse Finger Cookie Moss Green Tip
- Quick to Prepare: This recipe is simple and doesn’t involve complex techniques or hard-to-find ingredients.
- Fun Presentation: The eerie look of these cookies is sure to impress family and friends, making them a hit at parties.
- Perfect for All Ages: Baking these cookies can be a delightful activity for seniors, kids, and everyone in between.
- Versatile Flavor: The almond extract adds a depth of flavor that pairs wonderfully with a variety of beverages.
- Gory Goodness: The unique sculpture of the cookies adds an unexpected but fun twist, sparking conversations and laughter.
Almond Tips
When choosing almonds for these Corpse Finger Cookies, opt for whole almonds for the best effect. They should be fresh and unbroken to represent the “nails” convincingly. If possible, select almonds that have a slightly lighter color, as they will stand out beautifully against the green sanding sugar and pale cookie dough. Toasting the almonds lightly before using them can also bring out their natural flavor and add an extra crunch to the texture.
Options for Substitutions
- Instead of whole almonds, you can use slivered almonds for a different look.
- Substitute almond extract with vanilla extract if preferred.
- Coconut sugar can replace regular sugar for a lower glycemic option.
- Butter can be swapped for a vegan alternative like coconut oil or vegan margarine.
- All-purpose flour can be replaced with a gluten-free flour blend for gluten-sensitive bakers.
- For a pop of color, you can use colored sugar instead of green sanding sugar.
Watch Out for These Mistakes
One common mistake is overbaking the cookies; keep an eye on them as they bake. They should turn a pale golden color, but be cautious not to let them darken too much; otherwise, they can become dry.
Another oversight is not creaming the butter and sugar adequately. This step is crucial for achieving a light and airy texture in your cookies. Take your time, and mix until it’s fluffy and pale.
Additionally, be careful when rolling the dough into finger shapes. If they’re too thick, they’ll take longer to bake and might not have the finger-like appearance you’re aiming for. On the flip side, if they’re too thin, they might burn.
Lastly, ensure you’re using fresh baking powder, as old baking powder can lead to cookies that don’t rise well. A simple test is to mix it with a little warm water; if it bubbles, it’s still good!

What to Serve With Corpse Finger Cookie Moss Green Tip?
These Corpse Finger Cookies pair delightfully with a variety of beverages. Consider serving them with a warm cup of spiced cider or a refreshing glass of pumpkin ale for a seasonal touch. For a more subdued pairing, a simple cup of hot chocolate works wonderfully. You could also accompany them with fruit slices or a charcuterie board featuring bold cheeses that contrast the cookie’s sweetness.
Storage Instructions
Store: These cookies can stay fresh in an airtight container at room temperature for up to 4 days.
Freeze: If you want to keep them longer, you can freeze the cookies for up to 3 months in a sealed freezer bag.
Reheat: To enjoy them warm, simply place them in the microwave for 10-15 seconds or heat them in a toaster oven for a couple of minutes until warmed through.
Recipe Info
Preparation Time: 20 minutes
Cooking Time: 12-15 minutes
Total Time: 35-40 minutes
Level of Difficulty: Easy
Servings: Approximately 24 cookies
Estimated Nutrition
Start exactly with: “Estimated nutrition for the whole recipe (without optional ingredients):” The estimated nutrition for this recipe yields around 1,200-1,500 calories, with approximately 15-20 grams of protein, 90-110 grams of fat, and 150-180 grams of carbohydrates.
Ingredients
- 2.75 cups flour
- 1 cup butter (softened)
- 1 cup sugar
- 1 egg
- 1 tsp almond extract
- 1 tsp baking powder
- whole almonds (for nails)
- green sanding sugar for moss effect
- red gel icing
Step-by-Step Instructions
Step 1: Preheat Oven and Prepare Dough
Preheat your oven to 325°F (165°C). In a large bowl, cream the softened butter and sugar together until it becomes light and fluffy. Next, add the egg and almond extract, mixing well to incorporate. In a separate bowl, whisk together the flour and baking powder. Gradually add this mixture to the wet ingredients, stirring until a smooth dough forms.
Step 2: Shape the Cookies
Take portions of dough and roll them into finger-like shapes, tapering one end slightly. For a realistic touch, use a knife to press in indentations to resemble knuckles.
Step 3: Add the “Nails”
Press a whole almond into the tapered end of each cookie, making sure it is snug but not breaking the dough.
Step 4: Create the Moss Effect
Sprinkle a small amount of green sanding sugar near the base of a few of the cookie fingers. This gives them an eerie, mossy look.
Step 5: Bake Them to Perfection
Place the shaped cookies onto a baking sheet lined with parchment paper. Bake in the preheated oven for 12-15 minutes, or until they are a pale golden color.
Step 6: Decorate and Serve
Once baked, allow the cookies to cool slightly. Before serving, use the red gel icing to add a drop or two near the almond “nail” to mimic blood. Arrange them on a platter and enjoy the reactions!
In conclusion, these Corpse Finger Cookies are not just a delicious treat but also a fun project that brings families together. Whether you are looking for a unique baking experience or something to share at a gathering, this recipe is sure to impress. I encourage you to give it a try and let your creativity shine. Once you’ve made them, I would love to hear your feedback or see your versions of these spooky treats!

Corpse Finger Cookies
Ingredients
Method
- Preheat your oven to 325°F (165°C).
- In a large bowl, cream the softened butter and sugar together until it becomes light and fluffy.
- Add the egg and almond extract, mixing well to incorporate.
- In a separate bowl, whisk together the flour and baking powder. Gradually add this mixture to the wet ingredients, stirring until a smooth dough forms.
- Take portions of dough and roll them into finger-like shapes, tapering one end slightly.
- Use a knife to press in indentations to resemble knuckles.
- Press a whole almond into the tapered end of each cookie, ensuring it is snug but not breaking the dough.
- Sprinkle a small amount of green sanding sugar near the base of a few of the cookie fingers.
- Place the shaped cookies onto a baking sheet lined with parchment paper.
- Bake in the preheated oven for 12-15 minutes, or until they are a pale golden color.
- Once baked, allow the cookies to cool slightly.
- Before serving, use the red gel icing to add a drop or two near the almond nail to mimic blood.
- Arrange them on a platter and enjoy the reactions!
