Holiday Bacon Spinach Mini Quiches

Affiliate disclosure: This post may contain affiliate links. I may earn a small commission at no extra cost to you. See our Privacy Policy for details HERE.
These Holiday Bacon Spinach Mini Quiches are pure comfort in a small, golden crust. They bring the cozy flavors of a savory breakfast pie to the table in easy-to-serve portions. I love how festive they look, but they are just as welcome at a weekend brunch or a simple family breakfast.
Each bite combines crisp, smoky bacon with tender spinach, green onion, and shredded cheese. A smooth egg filling, seasoned with salt, black pepper, and dried parsley, brings everything together. Meanwhile, pie crust gives the mini quiches a buttery, flaky edge. Choose homemade crust or store-bought pie crust rolls to keep things simple.
To make them, cut the rolled crust into circles and press each one into a muffin cup. Then chill the crusts for an hour while you cook the bacon and whisk the egg mixture. Add the bacon, cheese, spinach, and green onion, pour in the eggs, and bake at 350°F until set. The hands-on steps are easy, and the chilling time helps the crust hold its shape.
Serve Holiday Bacon Spinach Mini Quiches at a holiday brunch, a potluck, or a relaxed family gathering. They also make a handy breakfast to prepare ahead, since you can refrigerate or freeze them and warm them when needed. Add a fresh salad or fruit, and you have a cheerful meal with very little fuss.

Why You’ll Love This Holiday Bacon Spinach Mini Quiches
- Easy to serve: Each mini quiche is already portioned, so guests can help themselves.
- Simple ingredients: Eggs, bacon, spinach, cheese, and pie crust make a familiar, satisfying combination.
- Good for gatherings: Make a batch for brunch, a holiday buffet, or a potluck.
- Flexible and convenient: Use homemade crust or store-bought rolls, and choose evaporated milk or half and half.
- Make-ahead friendly: Refrigerate the baked quiches for up to 4 days or freeze them for up to 3 months.
Bacon Tips
For the best flavor in Holiday Bacon Spinach Mini Quiches, choose thick-cut bacon that browns well and gives each bite a hearty, smoky taste. Chop it before cooking so the pieces are easy to divide among the muffin cups. Cook the bacon until crisp, then drain it on a paper towel and let it cool before adding it to the filling. That small step helps keep extra grease out of the egg mixture and makes the finished quiches easier to handle.
Options for Substitutions
- Use another cheese: Swap the shredded cheese for cheddar, Monterey Jack, Swiss, or a blend. For a stronger flavor, try sharp cheddar.
- Change the greens: Replace the spinach with finely chopped kale or cooked, well-drained mushrooms. Keep the pieces small so they distribute evenly.
- Try a different herb: Use dried thyme or Italian seasoning instead of dried parsley. Start with the same amount, then adjust to taste.
- Use another milk option: The recipe calls for evaporated milk or half and half. Either works; the filling may vary a little in richness depending on your choice.
- Choose another onion: Replace the green onion with a small amount of finely chopped yellow or red onion. For a milder taste, use less.
- Make a crustless version: Bake any extra egg filling in a greased muffin cup without crust, as directed. You can also bake all the filling without crust, though the portions will have a different texture and presentation.
Watch Out for These Mistakes
Cut circles about 3.8 to 4 inches wide so they can cover the bottom and sides of a regular muffin cup. If the circles are too small, the crust may not reach high enough to hold the filling. Also, press the dough gently into place instead of stretching it, since stretched dough can shrink as it bakes.
Do not skip the hour of chilling. Cold crust is easier to work with and is less likely to lose its shape in the oven. If you are short on refrigerator space, cover the muffin pan well and place it on a level shelf.
Next, cook the bacon until crisp, then drain and cool it before adding it to the cups. Warm bacon can soften the crust, while greasy bacon can make the filling oily. Finely chop the spinach and green onion as well, so each mini quiche gets a balanced amount.
Finally, leave 1/4 to 1/2 inch of room at the top of each crust when you pour in the egg mixture. Overfilled cups can spill as the eggs cook. Bake until the eggs are set all the way through, then let the quiches rest in the pan for 10 to 15 minutes before removing them. That cooling time helps the filling firm up and makes the crusts easier to lift out.

What to Serve With Holiday Bacon Spinach Mini Quiches?
Holiday Bacon Spinach Mini Quiches pair well with fresh, light sides that balance their rich bacon, egg, and cheese filling. Serve them with a bowl of mixed berries or sliced melon for a simple brunch, or add a crisp green salad with a mild vinaigrette. Roasted breakfast potatoes make the meal heartier, while a platter of sliced tomatoes and cucumbers brings a cool, fresh contrast. For a holiday spread, offer two or three sides so guests can build a plate they enjoy.
Storage Instructions
Store: Let the baked mini quiches cool, then place them in an airtight container and refrigerate for up to 4 days. For best quality, avoid leaving them at room temperature longer than needed to cool.
Freeze: First, arrange the cooled quiches in a single layer and freeze them until solid. Then wrap each one or place them in a freezer-safe bag or container. They keep for up to 3 months. Thaw overnight in the refrigerator before reheating.
Reheat: Warm refrigerated or thawed quiches in a 350°F oven on a sheet pan until heated through. You can also microwave them in short bursts until warm. For stovetop reheating, place a quiche in a covered skillet over low heat and warm gently, checking often so the crust does not overbrown.
Recipe Info
- Preparation Time: 20 minutes, plus 1 hour chilling
- Cooking Time: 20 minutes, plus 15 minutes cooling
- Total Time: 1 hour 55 minutes
- Level of Difficulty: Easy
- Servings: 12 mini quiches
- Calories: 128 kcal per serving
Estimated Nutrition
Estimated nutrition for the whole recipe (without optional ingredients):
- Calories: About 128-180 per mini quiche
- Protein: About 6-9 grams per mini quiche
- Fat: About 8-13 grams per mini quiche
- Carbohydrates: About 7-12 grams per mini quiche
These are estimates, since the nutrition can change with the pie crust, cheese, and choice of evaporated milk or half and half. The supplied calorie figure is 128 kcal per serving; actual values may vary by brand and portion size.
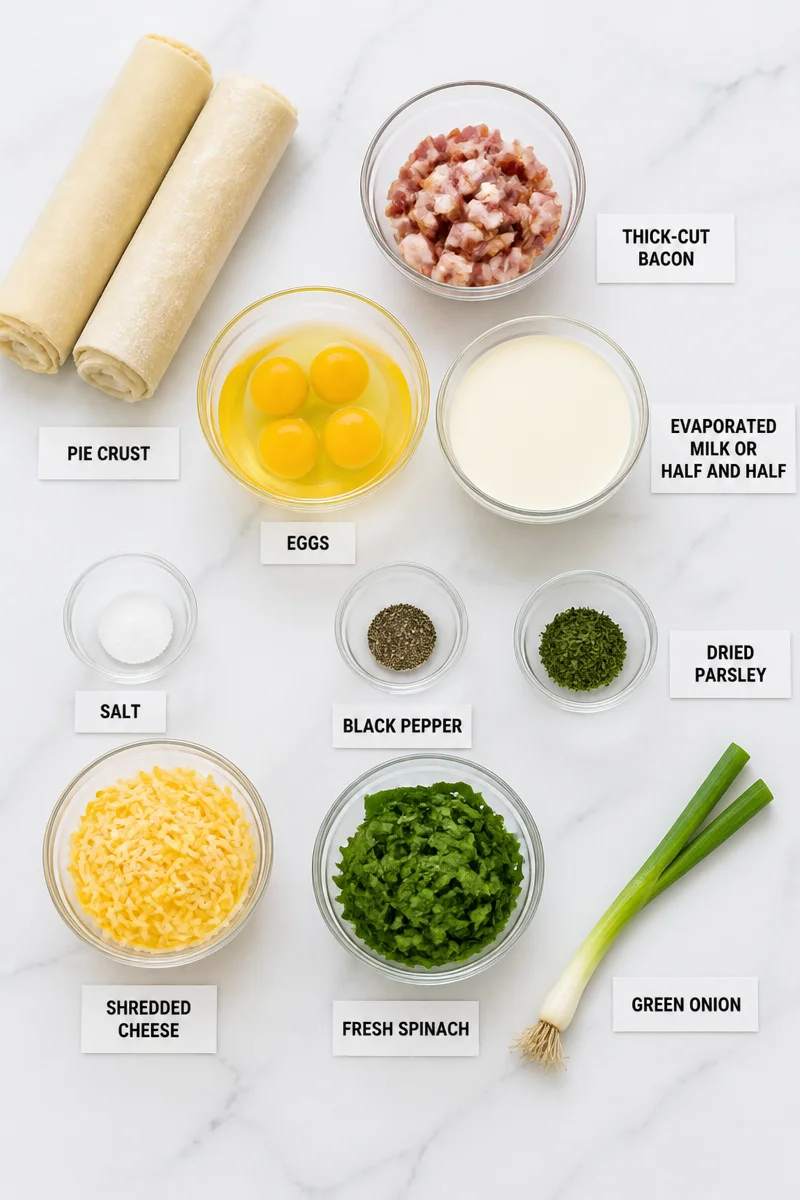
Ingredients
- For the crust:
- 1 batch homemade pie crust, or 2 store-bought pie crust rolls
- For the filling:
- 4 slices thick-cut bacon, chopped
- 4 large eggs
- 3/4 cup evaporated milk or half and half
- 1/4 teaspoon salt
- 1/8 teaspoon black pepper
- 1/2 teaspoon dried parsley
- 3/4 cup shredded cheese
- 1/2 cup fresh spinach, finely chopped
- 1 green onion
Step-by-Step Instructions
Step 1: Cut and Fit the Pie Crust
Prepare the pie crust, then roll it out on a lightly floured surface. Use a cookie cutter to cut circles about 3.8 to 4 inches wide. Press each circle into a regular muffin cup, fitting it across the bottom and up the sides. Make 10 to 12 crusts, rerolling the scraps as needed.
Step 2: Chill the Crusts and Cook the Bacon
Cover the muffin pan with plastic wrap and chill the crusts for at least 1 hour. Meanwhile, heat the oven to 350°F. Cook the chopped bacon in a skillet until crisp, then transfer it to a paper towel to drain. Let it cool before using.
Step 3: Whisk the Egg Filling
In a bowl, whisk the eggs with the evaporated milk or half and half, salt, black pepper, and dried parsley. Mix until the yolks and whites blend evenly. Set the bowl aside while you prepare the chilled crusts.
Step 4: Fill the Crusts and Bake
Divide the cooled bacon, shredded cheese, finely chopped spinach, and green onion among the crusts. Pour in the egg mixture, leaving 1/4 to 1/2 inch of space at the top. If you have extra filling, bake it in a greased muffin cup without crust. Bake the mini quiches for 20 minutes, or until the eggs are set all the way through.
Step 5: Cool and Serve
Remove the pan from the oven and let the quiches cool in the muffin cups for 10 to 15 minutes. Then lift them out carefully and serve warm. If you are saving some for later, let them cool completely before packing them for the refrigerator or freezer.
Conclusion
Holiday Bacon Spinach Mini Quiches bring together flaky pie crust, crisp bacon, spinach, cheese, and a tender egg filling in a convenient little serving. Chill the crusts before baking, leave room for the filling to expand, and let the finished quiches rest before removing them from the pan. You can serve them fresh, make them ahead, or freeze a batch for another day. Try this recipe for your next brunch or gathering, and share how it turned out.
