No Bake Chocolate Tart is the perfect way to indulge yourself and your loved ones without demanding too much time or effort in the kitchen. It’s pure comfort, combining the rich taste of chocolate with an easy-to-make crust. As the holidays approach or during quiet afternoons, there’s nothing quite like the feeling of serving a delightful dessert that captures the warmth of home.
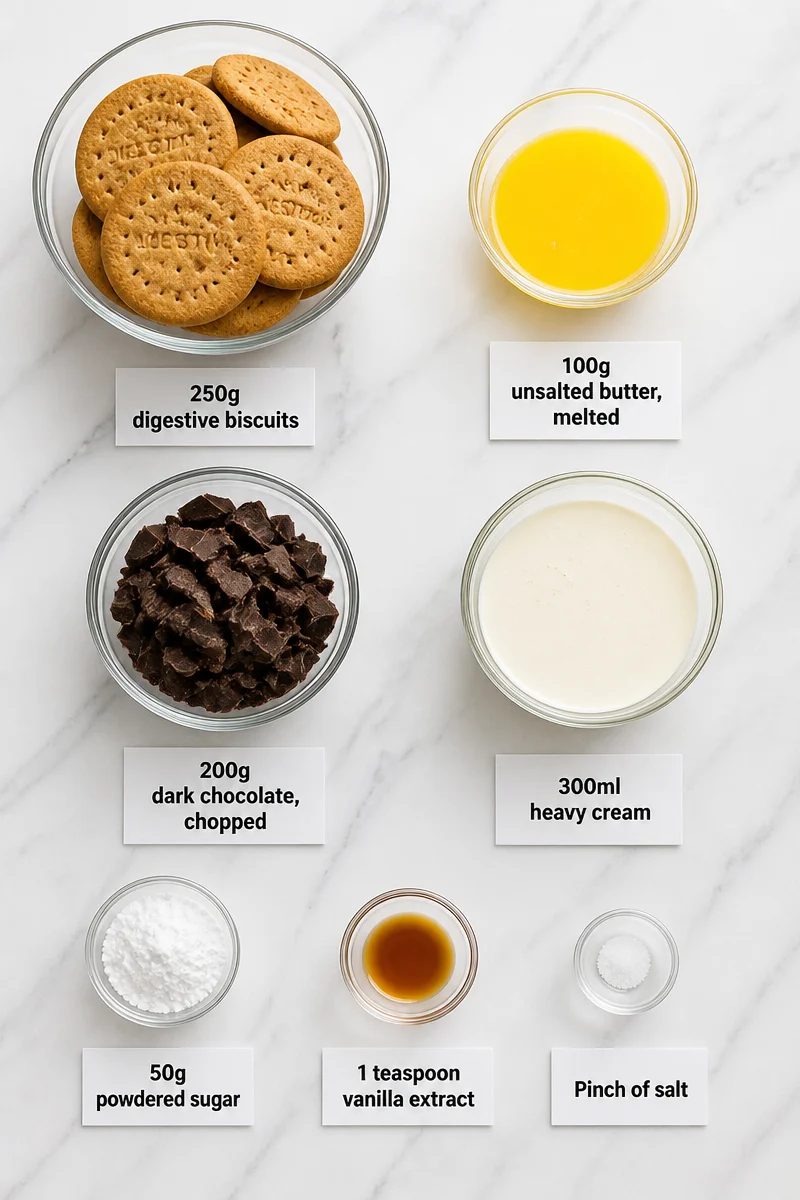
This tart fulfills not just cravings but creates a wonderful experience with its luscious ingredients. Imagine the buttery, crumbly texture of 250g digestive biscuits, melded with 100g of melted unsalted butter, forming a base that holds the delicious filling together. The decadent 200g of dark chocolate offers that rich flavor while 300ml of heavy cream combined with 50g of powdered sugar and a hint of vanilla extract brings a silky smoothness that will make each bite melt in your mouth. A pinch of salt balances out the sweetness, elevating the flavors beautifully.
The method to prepare this luscious tart couldn’t be simpler. Start by crushing the digestive biscuits in a food processor to create fine crumbs. Combine these crumbs with melted butter and press them into a tart pan to form the base. Next, heat cream until simmering, pour it over the chocolate, and let it sit before stirring until smooth. Fold in whipped cream, pour the mixture into the crust, and let it chill in the fridge until set. The simple steps allow anyone to create a fantastic dessert effortlessly.
This no-bake chocolate tart is perfect for any occasion. Whether you’re hosting a family get-together, celebrating a special event, or simply enjoying a cozy evening at home, this tart satisfies sweet cravings and adds a touch of elegance to your table.
Why You’ll Love This No Bake Chocolate Tart Dessert
- Quick to Make: It requires no baking, which means less time in the kitchen and more time for you to enjoy with family and friends.
- Simple Ingredients: With common pantry staples like biscuits, butter, and chocolate, you likely have everything you need already.
- Comfort Food: Rich and creamy, this tart provides that indulgent taste we sometimes crave.
- No Special Tools Required: You don’t need fancy gadgets; just a food processor and a mixing bowl are enough!
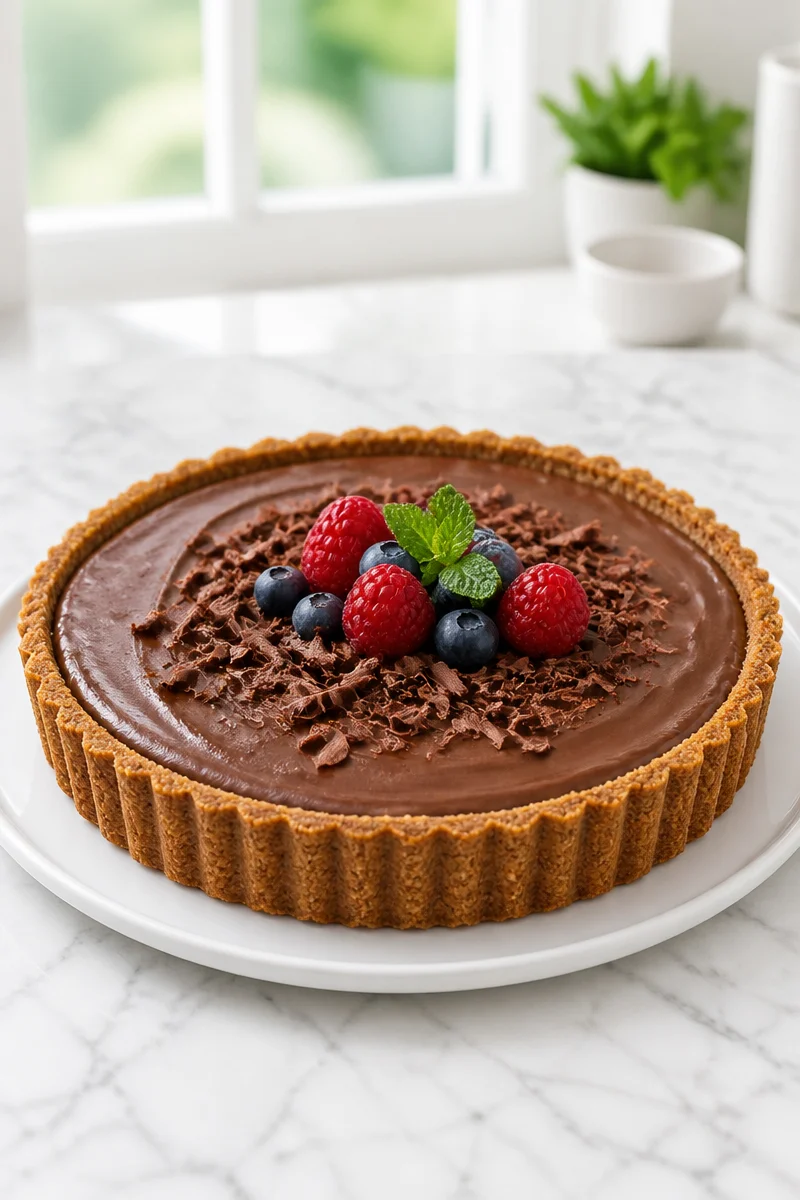
- Customizable Topping: You can modify your tart with different toppings, such as berries or chocolate shavings, allowing for personal touches.
Chocolate Tips
When it comes to selecting chocolate for this tart, quality matters. Opt for high-quality dark chocolate, ideally with a cocoa percentage between 60% to 70%. This range gives you that rich flavor without being overly bitter. Look for chocolate that has a smooth texture. When chopping the chocolate, make sure it’s in small, even pieces to ensure a uniform melting process. This will lead to a silky, luscious filling when combined with your cream.
Options for Substitutions
- Use Graham crackers instead of digestive biscuits for a different base flavor.
- Swap coconut oil for butter for a dairy-free option.
- Try milk chocolate for a sweeter, creamier filling if dark chocolate is a bit too intense.
- Replace heavy cream with coconut cream to maintain a dairy-free recipe.
- Use maple syrup instead of powdered sugar for a natural sweetener alternative.
- You can add a splash of espresso or coffee to the chocolate mixture for a mocha flavor.
Watch Out for These Mistakes
A common pitfall is not crushing the digestive biscuits finely enough. Large pieces can lead to a crumbly crust that falls apart when serving. Ensure you pulse until fine crumbs form. Another mistake is rushing the melting process. Avoid heating your cream on too high a flame; simmering ensures the cream doesn’t burn and retains its creamy consistency.
When mixing your chocolate with cream, allow it to sit for a couple of minutes before stirring. This step is crucial; it helps prevent the chocolate from seizing and guarantees a smooth blend. Lastly, be gentle when folding the whipped cream into the chocolate mixture. Overmixing can lead to a dense filling rather than the light, airy texture we aim for.
What to Serve With No Bake Chocolate Tart Dessert
This no-bake chocolate tart pairs wonderfully with a variety of side dishes. A scoop of vanilla ice cream complements the rich chocolate flavor beautifully. Fresh berries, such as strawberries or raspberries, add a lovely tartness that balances the sweetness. A dollop of whipped cream or a sprinkle of crushed nuts can elevate the presentation and texture, making each bite even more delightful.
Storage Instructions
Store: Keep the tart in the refrigerator, where it will remain fresh for up to 5 days. Make sure it’s covered with plastic wrap or stored in an airtight container to prevent it from drying out.
Freeze: If you need to keep it longer, this tart can be frozen for up to 2 months. To freeze, wrap it tightly in plastic wrap and then in aluminum foil to protect it from freezer burn.
Reheat: This dish is best served cold, so there’s no need to reheat. If you’re craving a warm dessert, you can slightly warm individual slices in the microwave for a few seconds, but be cautious not to heat it too much, as it can change the texture.
Recipe Info
Preparation Time: 20 minutes
Cooking Time: 10 minutes
Total Time: 4 hours 30 minutes (including chilling)
Level of Difficulty: Easy
Servings: 8 servings
Estimated Nutrition
Estimated nutrition for the whole recipe (without optional ingredients):
- Calories: 2100-2400
- Protein: 15-20g
- Fat: 150-180g
- Carbohydrates: 150-180g
Ingredients
- 250g digestive biscuits
- 100g unsalted butter, melted
- 200g dark chocolate, chopped
- 300ml heavy cream
- 50g powdered sugar
- 1 teaspoon vanilla extract
- Pinch of salt
Step-by-Step Instructions
Step 1: Crush the Digestive Biscuits
Using a food processor, pulse the digestive biscuits into fine crumbs. This should take about 30 seconds. If you don’t have a food processor, you can place the biscuits in a zip-top bag and crush them with a rolling pin until you achieve a fine consistency.
Step 2: Prepare the Crust
In a mixing bowl, combine the crushed biscuits with the melted butter. Stir until the crumbs absorb the butter evenly. Press this mixture into the bottom and up the sides of a tart pan. Make sure to pack it tightly for a sturdy crust.
Step 3: Heat the Cream
In a saucepan, heat 200ml of cream over medium heat until it begins to simmer. Do not let it boil; just bring it to that gentle simmering point to ensure the cream stays smooth.
Step 4: Combine Chocolate and Cream
Remove the saucepan from heat and pour the hot cream over the chopped dark chocolate. Let it sit for about 2 minutes. This waiting time helps the chocolate soften and melt perfectly.
Step 5: Stir Until Smooth
After 2 minutes, stir the mixture gently until the chocolate is fully melted and the mixture is smooth. Add in the vanilla extract and a pinch of salt for flavor enhancement.
Step 6: Whip the Remaining Cream
In a separate bowl, whip the remaining 100ml of heavy cream along with the powdered sugar. Whip until you reach soft peaks; it should be fluffy but not too stiff.
Step 7: Fold the Cream Into Chocolate Mixture
Carefully fold the whipped cream into the chocolate mixture. Use a spatula to combine gently, ensuring that you don’t deflate the whipped cream too much.
Step 8: Fill the Tart
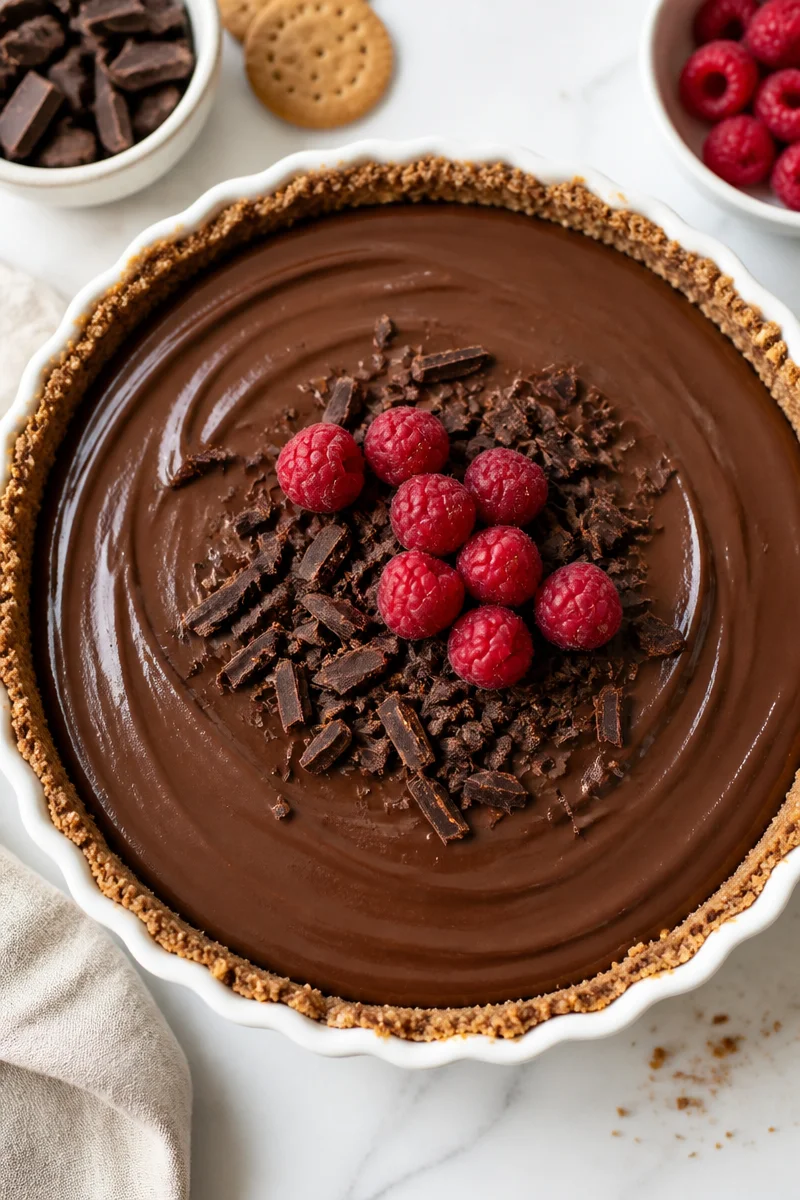
Pour the chocolate mixture into your prepared crust. Smooth the top with a spatula. Make sure it looks even and presentable, as this will be the visible part when you serve it.
Step 9: Refrigerate
Cover the tart with plastic wrap and place it in the refrigerator. Let it chill for at least 4 hours, or overnight if you can wait, allowing the filling to set perfectly.
Step 10: Serve and Enjoy
Once set, remove it from the fridge. Slice, serve chilled, and enjoy your delightful no-bake chocolate tart. You can optionally top it with chocolate shavings or fresh berries for an extra touch.
No matter when or where you serve this dessert, it is sure to be a hit. I encourage you to try this recipe, enjoy the process of making it, and share your thoughts or variations in the comments below. Happy baking!

No Bake Chocolate Tart
Ingredients
Method
- Using a food processor, pulse the digestive biscuits into fine crumbs.
- In a mixing bowl, combine the crushed biscuits with the melted butter until evenly mixed.
- Press the biscuit and butter mixture into the bottom and sides of a tart pan to form the crust.
- In a saucepan, heat 200ml of cream over medium heat until it simmers gently.
- Remove from heat and pour the hot cream over the chopped dark chocolate. Let it sit for 2 minutes.
- Stir the mixture gently until smooth. Add vanilla extract and a pinch of salt.
- In a separate bowl, whip the remaining 100ml of cream along with powdered sugar until soft peaks form.
- Gently fold the whipped cream into the chocolate mixture, trying not to deflate the whipped cream.
- Pour the chocolate mixture into the prepared crust and smooth the top with a spatula.
- Cover with plastic wrap and refrigerate for at least 4 hours, or overnight until set.
- Once set, slice, serve chilled, and enjoy. Optionally top with chocolate shavings or fresh berries.